 Beginning WordPress 3 is outdated! You should get the new edition instead: WordPress for Web Developers. (It’s the same book, only updated; we changed the title to make its intended audience clearer.)
WordPress comes with several basic content types: posts, pages, links, and media files. In addition, you can create your own content types, which I’ll talk more about in Chapter 12.
Posts and pages make up the heart of your site. You’ll probably add images, audio, video, or other documents like Office files to augment your posts and pages, and WordPress makes it easy to upload and link to these files. WordPress also includes a robust link manager, which you can use to maintain a blogroll or other link directory.
WordPress automatically generates a number of different feeds to syndicate your content. I’ll talk about the four feed formats, the common feeds, and the hidden ones that even experienced WordPress users might not know about.
Since WordPress is known for its exceptional blogging capabilities, I’ll talk about posts first, and then discuss how pages differ from posts—and how you can modify them to be more alike.
Posts
Collectively, posts make up the blog (or news) section of your site. Posts are generally listed according to date, but can also be tagged or filed into categories.
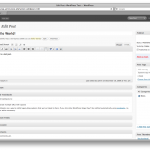
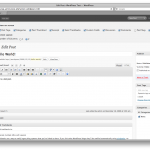
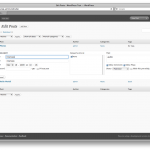
At its most basic, a post consists of a title and some content. In addition, WordPress will add some required metadata to every post: an ID number, an author, a publication date, a category, the publication status, and a visibility setting. There are a number of other things that may be added to posts, but the aforementioned are the essentials. Figure 4-1 shows the basic post editing screen.
You’ll occasionally need to locate the ID of a post or page, but it isn’t visible on any of the Edit screens. To find it, take a look at your URL while you’re editing a post or page or while you hover over a post on the Edit screen (Figure 4-2). The ID is the number at the end of the URL. In this case, the URL is example.com/wp-admin/post.php?action=edit&post=12 which means the ID is 12. If you prefer, you can install a plugin like Simply Show IDs, which will display the IDs next to the post titles on the Edit Posts screen.
Content
The content box lets you edit your content in a rich text editor (the Visual tab, on by default) or work with the underlying source code (the HTML tab). Most people are comfortable writing in the Visual editor. It behaves more or less like familiar desktop word processors, allowing you to add formatting (bold, italic, lists, links) without having to write HTML. Of course, if you know HTML, you can check the Visual editor’s work by switching to HTML view. In either view, the editor automatically converts single line breaks to <br /> tags and double line breaks to properly nested paragraphs. If you include <p> and <br /> tags in the HTML view, they’ll be removed unless they include attributes. For example, <p> would be removed, but <p class=”caption”> would not.
The last button in the Visual editor’s toolbar is labeled Show/Hide the Kitchen Sink. Press this button and a second row of tools will be revealed, including a dropdown that lets you create headings, addresses, and preformatted text using the appropriate HTML tags.
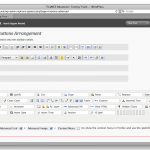
The Visual editor does not include tools for working with tables, subscripts, superscripts, and other relatively unusual formats. If you need these tools, use the TinyMCE Advanced plugin to add them to your toolbar. Install the plugin as described in Chapter 2, then go to Settings → TinyMCE Advanced to configure your toolbars. You’ll be able to create up to four rows of buttons (Figure 4-3). Simply drag the buttons you don’t want out of the toolbar areas and drop in the ones you do want to use.
If you often include code samples in your posts, you might find that the Visual editor mangles your formatting and changes some of your code to HTML entities. If this drives you crazy (or if you just hate the Visual editor!), you can turn it off entirely by checking the Disable the Visual editor when writing box in your user profile.
Dealing with Content from Microsoft Office
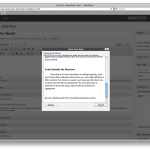
Even those who have been using WordPress for a while might have overlooked the handy Paste from Word button on the second row of the Visual editor’s toolbar. If your Visual editor’s toolbar has just one row of buttons, press the one labeled Show/Hide Kitchen Sink. In the second row, you’ll see a clipboard with the Word logo on it. Press this button, and you’ll get a pop-up screen where you can paste the contents of your Word file (see Figure 4-4). It works well with Excel tables, too, and even does a decent job with text copied from Adobe PDF documents.
Press Insert, and your post now contains the cleaned-up contents of your Word file. The editor will attempt to retain your formatting, and it will translate headings from Word’s style menu into proper HTML headings. It will also remove the Word-specific markup that will clutter your document if you paste it into the editor without using this tool, such as extraneous <div> tags, MsoNormal classes, inline styles, and smart tags.
Tip: If Paste from Word is not as thorough as you’d like, save your Word document as HTML, then run the resulting source code through the cleanup tool at wordoff.org before pasting it into your post’s HTML view.
Shortcodes
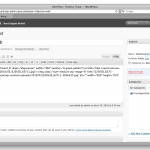
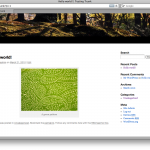
WordPress allows developers to define shortcodes—bracketed words that are replaced with content when the post is displayed to visitors. Shortcodes work like text macros in Microsoft Word. WordPress itself uses shortcodes to insert some forms of media (photos with captions, image galleries). A typical image caption shortcode is shown in Figure 4-5, and the resulting image display (in the Twenty Ten theme) is shown in Figure 4-6.
You might install plugins that provide more shortcodes. For example, if you have pieces of content that you’d like to write once and reuse throughout your site, you could define your own shortcodes using a plugin like Post Snippets (Figure 4-7) or Reusables.
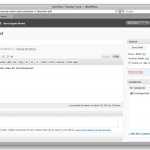
To create a snippet, enter the shortcode you’d like to use into the Title field, as shown in Figure 4-7. Then enter the expanded version in the Snippet field. You’ll see the shortcode while editing the post, as shown in Figure 4-8, but when a visitor views the post, she’ll see the expanded version, as shown in Figure 4-9.
Permalinks
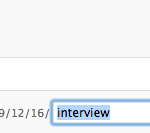
If you enabled permalinks in your Settings, you’ll see a Permalink field on each post and page. The portion highlighted in yellow is derived from the title, with spaces replaced by dashes and other punctuation removed. This is called the slug. (Posts, pages, categories, and tags all have slugs.) If you don’t like the generated slug or if it’s too long, you can edit it using the Edit button to the right (Figure 4-10). Note that you can’t edit the rest of the URL; it’s constructed based on the pattern you chose on the Permalink Settings panel.
If you edited your permalink and later decided you’d like to get the generated slug back, you can just delete everything in the slug field and press the Save button. WordPress will fill in the blank.
Publish Settings
In the Visibility section, you can choose who’s allowed to see your post. The default setting is public, which means that anyone can read it. Just below this option, you’ll see a checkbox labeled “Stick this post to the front page.” Making a post “sticky” means that it always appears at the top of lists, including archives, as well as your home page.
The other two Visibility settings are not as intuitive as they appear to be. A private post is one that only registered users of your site can read, if they have permission (in WordPress parlance, the capability) to read private posts. By default, only editors and administrators have this capability. You can change that fairly easily, but it requires a few lines of code in your theme files. You can also use a plugin like Members or my own Private Suite.
A password protected post is not public, but visitors don’t have to be registered users in order to read it. When you choose the Password protected option in the Visibility box, you’ll be asked to provide a password for the post. You can then give that password to anyone you like (in an email, let’s say). When they visit your site, they’ll see the title of the post but not the content. In place of the content, there will be a password field. When your visitors enter the correct password, they’ll see the post content.
The Status setting provides a rudimentary workflow for your posts. When you begin a new post, it remains in Draft status until you press the blue Publish button. At that point, the status changes to Published and the post becomes visible to your visitors. A contributor, who doesn’t have the ability to publish posts, would see a Submit for Review button instead of Publish. The contributor’s post status would then change to Pending Review, and an Editor would have to approve and publish the post.
You can leave posts in Draft mode indefinitely. If you need to close the editing screen before you’ve finished writing, press the Save Draft button rather than Publish.
Note: While the Permalink, Visibility, Status, and Publication Date fields have their own OK buttons, none of your changes to these settings will take effect until you press the blue Publish (or Update) Post button.
Publication Date and Scheduling Posts
When you press Publish, the post becomes visible to the public and its publication date is set to the current date and time. However, you can easily change the date if you need to backdate a post or schedule it to appear in the future.
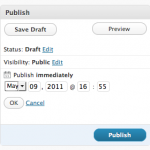
To change the date, press Edit next to Publish immediately in the Publish Settings box. An extra set of form fields will appear, as shown in Figure 4-11. Enter your desired publication date and press OK. If the date is in the past, the post’s publication date will be adjusted, and it will appear in the archives according to the new date. If you chose a date in the future, the post will be scheduled to publish at that time. The Publish button will change to Schedule, and the post will not be visible on your site (or in your feeds) until the time you specified.
Categories
Categories can be a powerful tool for organizing your posts. Many magazine-style themes for WordPress rely on categories to break articles into divisions, much like a magazine’s departments or a newspaper’s sections. You can also get a feed for each of your categories (see the Feeds section of this chapter). By styling your categories differently and publicizing the otherwise hidden feeds for individual categories, you can create the illusion of multiple blogs for your visitors, even though behind the scenes you’re maintaining just one. I’ll look at this more closely in Chapter 7.
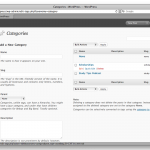
To manage categories, go to Categories under Posts in the main menu. You’ll be able to add, edit, or delete categories. You’ll also be able to add descriptions, change slugs, or even convert categories to free-form tags (Figure 4-12).
Categories can be arranged into hierarchies. When you create a new category, you’ll have the option to make it a child of an existing one. There is no limit to the depth of your categories.
Categories must have distinct slugs. Even if two categories have different parents and would therefore have different permalinks, you can’t assign them the same slug. If you choose a slug that’s already in use, WordPress will discard your new category and highlight the existing one that uses that slug.
When you’re editing an individual post, the Categories box shows a hierarchical list of all your categories. If you don’t check one, the default category you chose in your Writing Settings will be checked for you when you save the post. All posts in WordPress must have at least one category selected. However, you can select as many as you like. Once you’ve selected categories, they’ll be moved to the top of the list—outside the normal hierarchy—the next time you edit the post. If your hierarchy is important and you’d like to preserve the normal, indented view, use the Category Checklist Tree plugin.
Tags
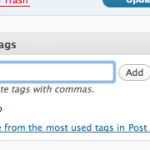
If you’re familiar with the concept of tagging from social media sites like Flickr, YouTube, or Delicious, the tag feature in WordPress holds no surprises for you. Tags are subject keywords, just like categories, but where categories must be set up ahead of time by an editor or administrator, authors are free to create new tags simply by typing them into the Tag box while writing a post (Figure 4-13).
Note that after you’ve added new tags, you must press Add in order to apply them. Then, you still have to press the blue Publish/Update button before your changes take effect.
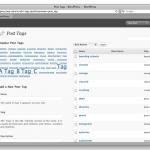
To manage your tags, go to Post Tags in the main menu. Here, you can add or delete tags, edit slugs, add descriptions, or convert tags to categories (Figure 4-14). Like categories, tag slugs must be unique—and since categories and tags share the same pool of slugs (they’re both considered taxonomies), a category and a tag can’t share a slug, even if they have the same name.
You can get feeds for each of your tags, as you’ll see in the Feeds section of this chapter.
Featured Images
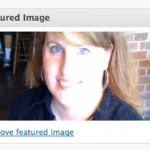
The featured image (formerly known as the post thumbnail) is an image that represents your post. It might be shown by itself, or alongside the post content or excerpt, depending on how your theme displays posts.
I talk about uploading images in the [link id=”5368″]Media Files[/link] section of this chapter.
If you don’t see a Featured Image box on your Edit Posts screen (Figure 4-15), your theme probably doesn’t support them. You can enable them by adding a line to your theme’s functions.php file. See Chapter 6 for details.
Excerpts
An excerpt is, as the box says, a summary of your post. Some themes show excerpts rather than the full content when posts are listed, either on the home page or in archives. If a theme calls for an excerpt and none is specified, it will be generated automatically from the post content. However, any HTML formatting will be removed. If your content contains lists or tables, the results might be very odd. You can preserve HTML formatting in excerpts using the Advanced Excerpt or the_excerpt Reloaded plugin.
Excerpts are shown with a continuation string. By default, ‘[…]’ is appended to your excerpt text. As of version 2.9, this can be modified via plugins.
Also new in 2.9 is the option to modify the length of your excerpts. By default, they are 55 words long.
Comments and Trackbacks
In Chapter 3, you set your preferences regarding comments and trackbacks. Here, you can override those settings for the current post. If you’re editing an existing post that has comments, you’ll see the comments listed, and you can edit them right from this screen.
Trackbacks are automated notifications (pings) from other sites that have mentioned your post. They let you (and your readers) know that there are conversations taking place elsewhere about something you wrote. Trackbacks are usually displayed alongside comments on a post (see Figure 4-16). Here on the Edit screen, you’ll see a list of any trackbacks your post has received.
In the Trackbacks box, you’ll be able to ping sites about your post. Keep in mind the list of sites you chose to ping for all your posts in the Update Services section of your Writing Settings. Also, if you chose on that screen to ping linked sites, any links included in your post will be pinged automatically. If you want to ping any sites in addition to your Update Services list and the sites linked in your post, you can add the URL in the Trackback section, as shown in Figure 4-17. If your post has already been published, this box will display a list of the sites that have already been pinged.
Custom Fields
Custom fields allow you to create new attributes for your posts and pages. Some common uses for custom fields include adding a mood to each blog post, providing custom CSS for posts or pages, listing what music you’re currently listening to or the books you’re reading, or setting an expiration date for posts. Many themes and plugins have been built around the idea of using custom fields to store an image to represent each post, but as of WordPress 2.9, that can be accomplished using the Post Thumbnail field instead.
Pages
Pages in WordPress are for all the things that are not part of a blog. You’ll notice that your first page, About, was created for you during installation.
Simple pages are much like posts: you need a title and some content, and that’s about all. The ID, author, date, publication status, and visibility will be set for you when you publish the page. However, there are some important differences. The publication date is not displayed for pages in most themes, and pages are not organized by date. Also, you probably noticed that categories and tags are not available for pages. Pages can be organized into a hierarchy, but since they exist outside the collection of posts, they don’t share the same metadata.
Page Attributes: Parents, Templates, and Order
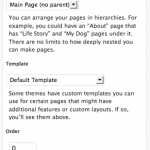
You can arrange your pages into filesystem-like hierarchies by making them children of parent pages (Figure 4-19). In the Attributes box on any single page’s Edit screen, you’ll be able to select another existing page as the parent. That page could, in turn, have another parent, and so on.
If you’ve turned on permalinks, your page’s URL will be built by adding its slug to that of its parent and any other page ancestors, as shown in Figure 4-20.
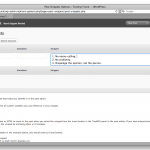
As you’ll see in Chapter 6, WordPress themes can have multiple templates for pages. When you create a new page template, it becomes available as an option in the parent dropdown portion of the Page Attributes box (Figure 4-21). To use your new template instead of the default page template, select it here and update the page.
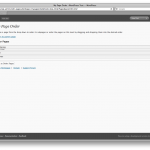
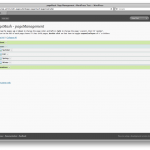
The page order determines how your pages are listed in navigation menus. Numbering them using this field is a bit like programming in BASIC; inevitably, you’ll find that you need to insert a new page between two existing ones, and then you’ll have to redo the numbering for all the pages. To avoid the problem, you can use a numbering scheme that leaves you plenty of room between pages (111, 222, 333, etc.). If you prefer, there are plugins that provide a drag-and-drop screen where you can rearrange your pages without having to count. My Page Order (Figure 4-22) and pageMash (Figure 4-23) are two of the best.
Posts vs. Pages: Same, but Different
Sometimes it’s not immediately clear whether your content would work best as a post or a page. On the surface, they are much the same in WordPress: they share a similar editing screen and both can accept comments and trackbacks. How do you decide which to use?
In general, posts are ideal for date-based content: blogs, podcasts, columns, newsletters, journals, or a press release archive. In short, for news of any kind, you should definitely use posts for that section. Putting the rest of your content into pages will provide a logical division for both your visitors and your content authors.
Posts are shown in a chronological sequence (usually newest to oldest) on a single page, such as your home page or an archive of posts from a particular month or category. Once your visitors select a post to view by itself, they’ll be able to read the comments as well as your content. Pages are generally not grouped in chronological order. Each page will appear on its own screen. You can create a list of pages using a widget or a menu (see Chapter 6).
If your site consists mainly of articles that will not often change and need to be arranged in a simple hierarchy, like files in folders, then pages will probably work well for you. In this case, you could ignore the post screens altogether or create a basic “What’s New?” blog as an adjunct to the main site.
If no such clear division exists in your content, think about your content taxonomy and your subscribers’ needs. Pages do not have tags or categories. They can be arranged in a parent/child hierarchy, but if you need a more complex or flexible taxonomy, posts would probably work better. Also, pages are not included in feeds. Will your readers want to be notified every time you add a document? If so, your content should go into posts.
Posts are Pages; Pages are Posts
Posts and pages in WordPress are essentially the same thing. They share the same table in the WordPress database (wp_posts), with one field to distinguish them: type, which could be “post” or “page.” (In fact, media files also share this table, as you’ll see later.) Posts and pages use most of the same fields in that table. The big difference is in the way they’re presented to you. Even though all the database fields are available to each type of content, only some of those fields appear in the Edit panels.
As with nearly everything in WordPress, this default behavior can be changed using plugins. For example, you can add excerpts, categories, and tags to pages.
Pages do not have excerpts, even though they have a database field for them. Since pages never appear in archive lists, excerpts would never be used for pages in a typical WordPress site. However, excerpts can be useful for pages as well as posts. For example, you might tweak your search results theme file to display excerpts rather than the full post content. Also, some heavily customized themes do list pages in archive-like lists. You can use a plugin such as PJW Page Excerpt or Excerpt Editor to add excerpts to your pages.
In version 3.0, you can create content types of your own in addition to the built-in posts and pages. In Chapter 12, you’ll see some examples of custom content types.
Editing Posts and Pages
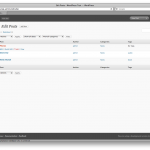
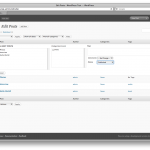
You can filter the list of posts by category or date using the dropdown menus at the top of the list. You can also search your posts and pages using the box at the top right side of the Edit screens, but beware: it searches not only the titles but the complete content of posts and pages.
Autosave
WordPress does save your posts automatically, once per minute, as you write. However, if you try to publish or update a post while the autosave is running, you’ll get nowhere: the button is deactivated while autosaving. So how can you tell when it’s safe to hit the button? The button’s colors will fade out, but the effect is subtle: the button loses its three-dimensional, shadowed look and becomes a flat shade of blue. The button text becomes light blue instead of white (Figures 4-24 and 4-25) and a small donut-shaped progress indicator appears next to it.
When in doubt, check your browser’s status bar. Is the page reloading? If so, wait for the yellow Post updated message to appear at the top of the editing screen. If you pressed the button but the page isn’t reloading, try again.
By default, WordPress autosaves every sixty seconds if you’ve made changes in the content editor. You can adjust this timing by adding this line to your wp-config.php file:
define('AUTOSAVE_INTERVAL', 120 ); // autosave every two minutes
Screen Options
Like the Dashboard, the Edit Posts and Pages panels have Screen Options available. You can choose which columns you want to see; the post/page title will always display, but the author, categories, tags, comments, and date columns are optional. You can also choose how many posts or pages you’d like to see per page (Figure 4-26). Twenty is the default, but you can increase it if you have lots of content and you’d like to scroll through it faster. Keep in mind that the more posts or pages you put on each screen, the longer it will take WordPress to generate the screens.
Screen options are also available when editing individual posts and pages (Figure 4-27). If you’re working on a small screen or a monitor with a low resolution, you might want to switch your editing layout to a single column. You can also choose to disable boxes you don’t intend to use. For example, if your site doesn’t use custom fields, you might turn off that box so you don’t have to scroll past it to see the post revisions.
Quick Edit
If you need to change the attributes of a post or page without editing the content, you can do so quickly using the Quick Edit feature. Go to Edit Posts (or Pages) and hover your mouse over the post you want to modify. A row of links will appear below the title: Edit, Quick Edit, Delete, and View. Choose Quick Edit, and the table row will transform into a miniature editing form (Figure 4-28) that lets you change nearly everything about the page except the content, excerpt, and custom fields.
Bulk Edit
What do you do when you need to change the attributes of many posts or pages at once? Again, go to Edit Posts (or Pages). Select the checkboxes next to the posts you want to edit, then choose Edit from the Bulk Actions dropdown above the list of posts and press Apply. (If you want to select all the posts on the page, just use the checkbox in the gray table header.)
The Bulk Edit form (Figure 4-29) offers fewer options than Quick Edit. Things that would be illogical to change for multiple posts, like titles and publication dates, are not available. You can edit the categories and tags (for posts), parent and template (for pages), and the comment, trackback, visibility, and publication status settings.
Media Files
WordPress allows you to upload virtually any kind of file and attach it to your post or page. You can add files using the uploader found on the individual post/page editing screens and in the Media Library section. Files are stored in the location you specified on the Media Settings panel.
WordPress offers specific upload dialogs for various file types. In order, the icons represent images, videos, audio files, and all other file types. While the upload interface looks more or less the same no matter what kind of file you’re working with, the settings you choose will vary depending on the file type. Let’s take the four categories one at a time.
Images and Galleries
Edit any individual post or page, and you’ll see that there’s a group of four icons labeled Add Media above the content box. Click the first icon (Add an image) and a pop-up box should appear with three tabs: From Computer, From URL, and Media Library. Once you’ve uploaded at least one file to this post, you’ll see a fourth tab, Gallery.
Editing Images
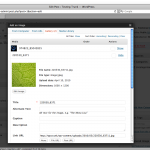
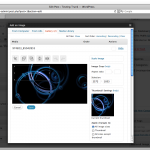
The WordPress media uploader includes a basic image editor. You can crop, resize, and rotate the images you’ve uploaded. To begin, click the Edit Image button beneath the thumbnail shown in the image details (you can see this button in Figure 4-31). A simple editing interface will appear (Figure 4-33). Click the image once, then drag your cursor to choose an area to crop. If you want to scale or crop the image to a precise number of pixels, use the numeric scaling and cropping forms to the right of the image.
Galleries
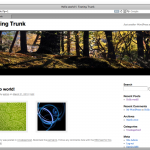
If you have several images to add, you can do them all at once and insert them as a gallery rather than working with them one at a time. Instead of Insert into post, click Save all changes at the very bottom of the window. When you’re finished uploading files, choose the Gallery tab. This is where WordPress groups all the photos that have been uploaded for this post. If you want to edit the title (or other details) of a photo, click Show (to the right). When you’re done, you can insert all the post’s photos at once by clicking Insert gallery into post at the bottom of the pop-up. You’ll see that [ has been added to the post’s text. Just leave that shortcode on its own line and type whatever else you’d like to say. When you publish the post, a thumbnail-sized copy of each photo appears in the post, as shown in Figure 4-34. The thumbnails will be linked to a new page, where the full-size copy of the photo will appear along with the title and description you entered. ]
]
Inserting an Image from a URL
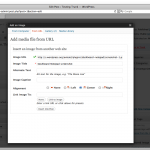
You can use images hosted on another site without downloading them to your computer and uploading them into WordPress. Instead of selecting files to upload, click the From URL tab. You’ll be asked for the source URL in addition to all the usual image fields (Figure 4-32). However, WordPress won’t generate other sizes; you have to use the image as-is.
Keep in mind that images inserted this way are not copied to your server. If the owner of the original file moves or deletes it, it will no longer appear in your post.
Uploading an Image from Your Computer
The media uploader comes in two forms. By default, if you have Flash installed, you’ll see the Flash-based uploader. This allows you to upload multiple files at once. However, if you don’t have Flash installed, or if the Flash uploader doesn’t work correctly, you can switch to the browser uploader. This gives you a basic Browse button that allows you to upload one file at a time.
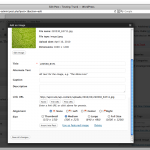
Using either version of the uploader, go ahead and choose an image to add to your post. Once WordPress has processed the image, you’ll see a dialog (Figure 4-30) where you can fill in details about the image: a title, a caption, a description, a link URL, and some alignment and size options.
Title: This is for internal use only. When you’re browsing your media library, you’ll see this title next to a tiny thumbnail of the image. If you don’t fill in a title, the file name will be used.
Caption: This will be shown beneath the image in your post. The exact formatting will depend on your theme’s stylesheet.
Alternate Text: The text that will be displayed if the image is missing. It will be read aloud to visually impaired users browsing your site with a screen reader.
Description: This will be displayed in your media library. It will also be displayed on the image’s attachment page, if you’re using the [ ] shortcode.
Link URL: This lets you specify whether your image is linked, and if so, where it leads. Linking to the file URL is a great way to let your visitors see the full-size image if you’re inserting a smaller version. If your post discusses another site, you might choose to paste that URL here instead.
Alignment: Choose whether the image should be aligned to the left, the right, in the center, or not at all. If you choose left or right alignment, your post text will wrap around the image. If you choose center, your image will appear on its own line.
Size: You can insert the full-size image into your post. WordPress will generate up to three smaller sizes (based on the dimensions you choose in your Media Settings), and you can choose any of these if one will fit better in your post content.
Some themes do not support image alignment. If your images are not aligned correctly, add the lines in Listing 4-1 to your theme’s styles.css file. These CSS rules correspond to the classes WordPress inserts into image tags; with these styles in place, your images will be aligned according to the settings you choose in the upload screen.
Listing 4-1. Image alignment styles
img.alignright, a img.alignright { float:right; margin: 0 0 1em 1em}

img.alignleft, a img.alignleft { float:left; margin:0 1em 1em 0}

img.aligncenter, a img.aligncenter { display: block; margin: 1em auto; }
Below these fields, you’ll see a button that lets you insert the image into your post. If you’ve enabled post thumbnails, you’ll see a link that will set the current image as the thumbnail. Off to the right, you’ll see a link to move this image to the trash.
If you chose multiple files, you’ll see all these options for only the first file. Below the form, you’ll see a collapsed row for each additional file. To edit the details for these, you’ll need to click the Show links off to the right. The first image’s form will collapse, and the one you chose will expand (Figure 4-31).
Video
Uploading videos is much like uploading audio. You’ll be asked to fill in the four basic attributes: title, description, caption, and link URL. Inserting the file into the post results in a plain link to the video file. For most site owners, that will not be satisfactory. As a result, there are a number of plugins available that will replace your video file links with video player interfaces (usually Flash-based). My favorite is XHTML Video Embed, but you’ll find dozens in the Extend section of wordpress.org.
oEmbed
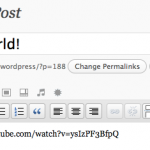
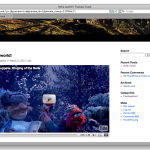
Embedding video from other sites is quite easy. As of version 2.9, WordPress supports the oEmbed standard. What this means is that you don’t have to paste the complicated HTML provided by sites such as YouTube. Instead, you can simply paste the URL of the video page into your post as plain text. If you turned on the oEmbed options in your Media Settings, try it out now! Grab a URL from YouTube, save your post (Figure 4-35), and view it. If everything is working as expected, your plain text URL should have been replaced with a video player, as shown in Figure 4-36.

OEmbed works with a number of video providers. See codex.wordpress.org/Embeds#oEmbed for a complete list. This page also contains instructions on adding other video providers, if your favorite is not already included.

Audio
Uploading audio is fairly straightforward, too: choose the file, and you’ll be asked to fill in the title, description, caption, and link URL. When you press Insert into post, a link to your audio file will appear. If you’re not thrilled with this low-tech approach, take a look at the popular Audio Player plugin, which replaces links to MP3 files with a simple Flash player interface.

Podcasting
Podcasting with WordPress is relatively easy. If you’ve inserted your audio file into your post (even as a simple link), WordPress will automatically add the proper enclosures to your feeds. However, if you want to include your podcast in the iTunes podcast directory, you’ll need a plugin to configure some additional fields for your feed. PodPress reigned supreme among podcasting plugins for quite some time, but was abandoned by its developers and doesn’t work with recent versions of WordPress. Podcasting is the best plugin currently available. If you’d like to manage more than one podcast using categories, the Podcast Channels plugin will configure the additional feeds necessary.
Tip: The various podcasting plugins work for both audio and video podcasts.
Other File Types
For all other kinds of files, you can use the fourth icon, the one shaped like a starburst. For these files, you’ll have just a few attributes: title, caption, description, and link URL. As with audio and video files, inserting another file type will result in a simple link to the original file.
Unfortunately, there is no easy way to list all the files attached to a post, unless they’re images. The [
] shortcode doesn’t work with Word documents or PDFs. You can use the List Child Attachments plugin, which provides both a template tag and a shortcode to list all attached files.
File Sizes and Upload Permissions
If you are working with other users, occasionally your content authors might get an error message when uploading unusual file types. While the error might mention the file size as a potential problem, more likely the real issue is the unfiltered upload capability in WordPress user roles. You’ll quickly find, for example, that only administrators can upload Flash videos (.flv). To get around the problem, you can use Role Manager or Members to allow unfiltered uploads for other user roles, or you can use a plugin (like PJW Mime Config) that allows you to specify individual MIME types that will be allowed.
Of course, it’s possible that the file size really is the problem. If you have access to your server’s php.ini file, increase the file_uploads, upload_max_filesize, and post_max_size values. If you can’t modify php.ini, check with your server administrator.
The Media Library
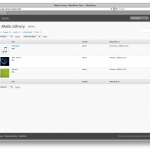
You can see and edit the details for all the media files currently on the site (Figure 4-38) by choosing the Media Library option in the main navigation menu. You can add files to the library directly. They won’t be associated with any posts or pages and won’t be included in galleries, but individually they can be inserted into posts and pages from the Media Library tab in the upload dialog box.

Links
WordPress comes with a handful of links to resources on wordpress.org. These are all useful sites, and you should bookmark them for your own reference, but they’re probably not the sort of thing you want to promote to your visitors. Let’s delete them! In the main navigation bar, choose Edit under Links. At the top of the list, in the gray table header next to Name, you’ll see a checkbox. Select it and all the prepackaged links will also be selected. In the Bulk Actions dropdown, choose Delete and hit Apply. Now you’re ready to add some links of your own. Click the Add New button at the top of the page.
Basic Link Attributes
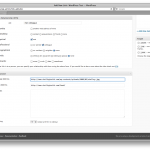
The Name you specify here (Figure 4-39) will be used as the linked text. Copy the link URL into the web address field. If you’d like to stop there, you can! All the other fields are optional.
Depending on how your theme handles links, the description might be shown as text or as a title attribute on the link tag, which will be shown when you hover over the link.
Links do not use the same group of categories that posts do. If you’ve just installed WordPress, you’ll have one link category, Blogroll. You can manage your link categories by choosing Categories in the Link section of the main navigation menu. If you don’t choose a category when adding a link, the default you specified in your Writing settings will be used.

Link Relationships: XFN™
XFN™ (XHTML Friends Network) is a microformat; that is, it’s a way of adding classes and IDs to basic tags in order to turn plain HTML into a richer source of data. XFN lets you indicate how you know the people whose sites you’re adding to your blogroll. XFN data is not visible to visitors. It’s used by search engines and social networking sites to determine your relationship to the people listed in your outbound links.
If you’ve defined your relationship with the owner of a link, WordPress will add the rel attribute to your <a> tag. For example, if you and your brother live in the same household and you’re linking to his site, you would choose co-resident in the geographical settings and sibling in the family group, and WordPress would generate the link like so:
<a href=”http://example.com” rel=”co-resident sibling”>…</a>
The various relationship options should be relatively self-explanatory, but you can read the full explanation of each at the WordPress Codex page at codex.wordpress.org/Defining_Relationships_with_XFN.
Do not fill in the rel text box. It will be filled in automatically as you check off the options in the XFN area, so you can preview your rel attribute before saving your link.
All XFN fields are optional. If you don’t care to specify how you know someone, simply leave this section blank.
Advanced Link Attributes

The image address (Figure 4-40) is the URL of any image you want to represent your link. You could use something small, like a favicon that could be displayed next to the link text in a typical blogroll list. At the other extreme, you could choose a large image, and customize your theme so that the images are shown and the titles appear only as alt or title attributes. Using this technique, you could turn your link manager into an image gallery—and, by adding a little Javascript into the mix, you could even transform it into a featured content carousel.
Justin Tadlock has written an excellent tutorial on using link images to create a gallery. See justintadlock.com/archives/2009/01/09/creating-an-image-gallery-with-wordpress-bookmarks for more information.
Tip: To use images from your own site as link images, upload them in the Media Library, then copy the file URL to use in this field.
The RSS address field is intended to store the feed (which could be Atom or RDF, not just RSS) of the site you’re linking to. However, this field is seldom used in themes. The notes field is also not generally used in themes; you can use it to store private notes for yourself (and any other users of your site who might edit links).
While few themes take advantage of the rating field, it could be essential if you were building a link directory with the links manager.
Finally, you can make the entire link private if you wish. All the link information will be stored in your link manager, but none of it will appear when link lists are displayed on your site.
Link Feed
WordPress generates a feed of your links. The OPML format is commonly used to share lists of links (like bookmark files and blogrolls) on the web, so WordPress generates a basic OPML 1.0 feed, located at example.com/wp-links-opml.php.
Feeds
WordPress generates RSS 2.0 and Atom 1.0 feeds automatically for your posts. Links to these feeds are available in your site’s footer if you’re using the default theme, and can be added to other themes using the Meta widget. If you’re using a browser (like Firefox) that discovers feeds automatically, you’ll see that both feeds are available on every page of your site. Both feeds display your most recent posts, as determined by the number you chose on the Reading Settings panel. If you’ve set up permalinks, you can find your feeds by adding /feed (for RSS) or /feed/atom to your site’s URL. If you haven’t set up permalinks, you can use the query string URL format instead: /?feed=rss2 or /?feed=atom.
WordPress also includes feeds for the most recent comments on your post. The number of comments displayed, like the number of posts, is based on the number you chose in the Readings Settings panel.
However, WordPress generates a number of other feeds in addition to those for posts and comments (see Table 4-1). There’s a feed for each of your categories and tags. You can get feeds of the posts written by an individual author. You can even get feeds for search results!
Since WordPress doesn’t advertise these hidden feeds, you’ll have to do a little URL manipulation to find them. Of course, once you’ve located them, you can place the links somewhere in your theme so your visitors can find them too.
Summary
If you’ve been playing along at home, your new WordPress site is now chock-full of delicious content. In Chapters 6 and 7, I’ll talk about how to make that content look good by creating your own theme.
Things to keep in mind:
- When choosing between posts vs. pages, any content that’s organized by date or anything that belongs in a feed should be stored as a post.
- Stored revisions can drastically increase the size of your database. Limit the number of revisions WordPress keeps if you’re concerned about storage space.
- Use your screen options, bulk edit, and quick edit features when you need to make fast changes to groups of posts or pages.
- Audio and video uploads will be treated as links. Install a plugin if you want to provide your visitors with a player interface instead.
- While WordPress generates lots of feeds for you, most of them aren’t visible to your users. Create links in your theme files or a text widget if you want to make them available.


