
I haven't updated this to reflect the UI changes and new features in 2.3 yet. Updates coming in a few days! -- December 7
The plugin works by reading HTML as XML and copying the specified tags’ contents into various WordPress fields. It therefore works best with well-formed HTML. Your files don’t necessarily have to validate according to the W3C specification, but they should at least contain tags that are properly nested. The importer will try to import improperly nested HTML, but it might not work as you expect!
The files you are importing must be on the same server as your WordPress installation. If you do not have (S)FTP access to the old site, you can use an application like SiteSucker to download the files. (I've done this a few times for clients who'd forgotten their passwords.) The importer works great on the downloaded files.
If you choose to import the files as pages (or any hierarchical post type), the new page hierarchy will match your original directory hierarchy. If the directory contained a default index file (in this case, index.html), the contents of that file will be used for the parent page. For example, on this site, there were two files in a "keynotes" directory:
The importer used the index file to represent the folder, then imported the other file in that directory as a child page:

Importing can be tricky, and it doesn’t always go well the first time. Therefore, it’s important to install the DB Backup and Mass Page Remover plugins in case you need to start over. (Despite the name, Mass Page Remover works just as well on posts.) You’ll probably need to do a little bit of cleanup work afterward, so you’ll need to install the Search and Replace plugin as well.
If you’re importing content into a WordPress site that already contains content, back up your database and put the site into maintenance mode before you begin importing. Seriously, stop reading and back up now.
If you’ve installed a plugin that crossposts your content to another site (like Facebook or LiveJournal) or automatically notifies another site of your new posts (like Twitter), be sure to deactivate those plugins before you import. Otherwise, you’ll flood your social network with your imported posts!
It's a good idea to look through your HTML files and make sure things are consistent before you run the importer. For example, the importer will give you an option to remove a repeated phrase from page titles. (Most WordPress themes automatically insert the site title into the <title> tag, so you don't want that to be part of each post's title, or it'll be duplicated.) In order for this to work, the phrase must be exactly the same in all your files. Of course, you can change the page titles after the files have been imported, but it's usually faster to edit the files than to edit and save each WordPress entry.
Even more important: you need to make sure that the content you want to import from each file is surrounded by the same HTML tag or Dreamweaver template region.
Finally, if you want the importer to copy your linked images into the Media Library, make sure the image paths are correct! The importer can handle all of the following path styles, as long as they work:
<img src="http://example.com/images/foo.jpg" />
<img src="/images/foo.jpg" />
<img src="../../images/foo.jpg" />
<img src="foo.jpg" />
This is a complicated importer with lots of options. The settings page (Settings → HTML Import) is broken up into six sections. You need to look through the first five before you run the importer. The sixth (Tools) contains links to some tools that are helpful after you've imported.

Find the absolute path—not a site- or file-relative one—to this directory. On a Windows machine, that path will begin with a drive letter (e.g. C:\sites\public_html). On a UNIX-based server (including Macs), the path will begin with a slash (e.g. /users/username/home/public_html or /Library/WebServer/mysite). You may leave this blank if you plan to upload a single file later, but if you can fill that file's path anyway, do so. The importer will then be able to locate any linked images in the uploaded file.
Don't fret about whether or not to include the trailing slash. The importer will figure it out.
Do not enter a URL for the directory to import. This MUST be a path to a directory on the same server as your WordPress installation.
The old URL should correspond with your beginning directory. This will be used generate .htaccess redirects and locate images. This is not where the importer will search for files to import; those must be specified using the directory option above.
If you are importing a subdirectory and not the full site, update this URL to include the subdirectory. For example, if you are importing /Sites/old_site/public_html/about/, the URL should be http://example.com/about/.
The name of directories' default (index) files for this site. This is usually index.html on Apache servers and default.htm on IIS.
The importer will scan your beginning directory for files to import. You should specify the types of files you want to import (so the importer doesn't try to read HTML out of an MP3, for example). All file types NOT listed here will be ignored.
The importer does not want spaces between extensions or directory names, but you can add them if it makes things easier to read. The importer will remove them when you save the options.
You may enter the names of directories that will not be scanned for files to import. Paths to specific directories will not work; you need to simply add your directory's name to this list. This way, if you have twelve directories called "images" at various levels in your directory hierarchy, you can skip all of them. If you have several directories that share a name, like "media," and you need to skip some of them but import one or two, rename the directories you want to keep while you run the import.

To select the part of the file that contains the main content—what will become the post or page content in WordPress—you can specify an HTML tag or a Dreamweaver template region.
If your pages are based on Dreamweaver templates, select the Dreamweaver option and enter the name of the content area (e.g. “Main Content”) into the template region field.
If you’re using a tag without attributes, or where the attributes don’t matter, simply enter the tag (without brackets) in the tag field, and leave the attribute and value fields blank. For example, if you need to import the entire <body> tag, your fields would look like this:

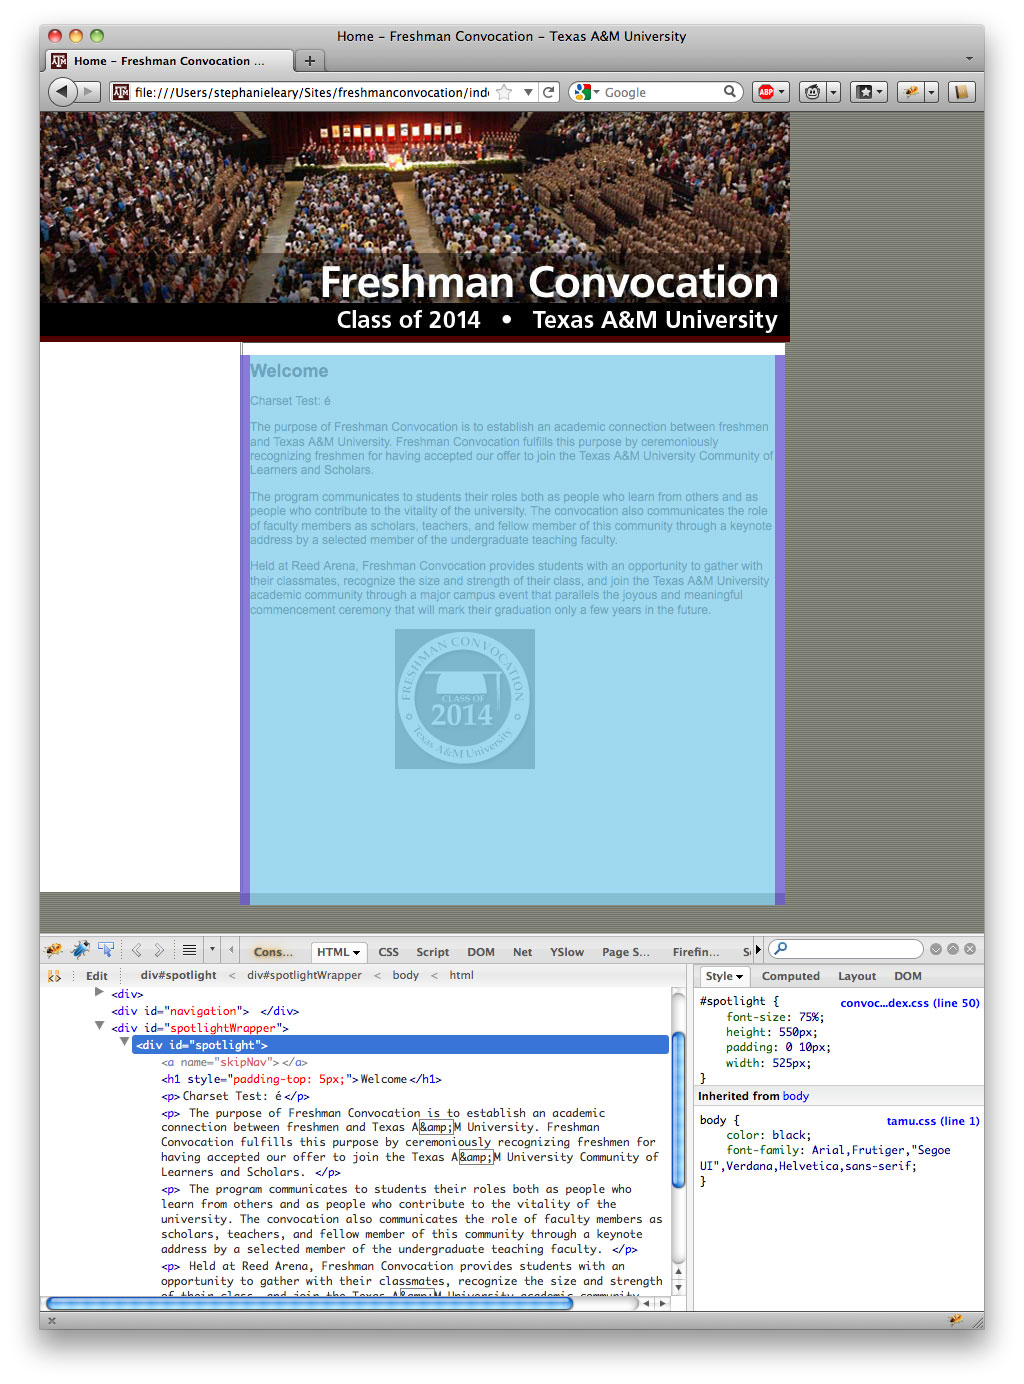
If your tag does have an attribute that makes it unique, enter the attribute name (like class or id) in the attribute field and the value in the value field. For example, if your content is contained in the <div id="spotlight"> tag, your import setting would look like this:

Table cells will work, too, even if they don't have a class or ID -- as long as they do have a width attribute with a unique value. For example: Tag: table, Attribute: width, Value: 730 will work just fine.
Firebug makes it easy to find the right tag. Open it, press the arrow ![]() button, and hover your mouse over the section you want to import. It will highlight the appropriate tag in the HTML view:
button, and hover your mouse over the section you want to import. It will highlight the appropriate tag in the HTML view:
If you choose to import meta description tags as excerpts, the excerpts will be stored for both posts and pages. However, WordPress pages don't normally have excerpts. To edit and/or display excerpts for pages, you will need to install a plugin such as PJW Page Excerpt or Excerpt Editor.
If your original files used a character set other than UTF-8, you should check the option to convert special characters.
With this option checked, the importer will attempt to copy your images to the Media Library, add them to the appropriate post as attachments, and replace the src="" paths in all your image tags. It will check for duplicates, so that images used in several pages will be imported just once.
Linked images will be imported no matter where they are located. It's fine to leave images in your list of skipped directories, since that setting just tells the importer where to look for the HTML files.

You can have the importer clean up any unneeded HTML, if you wish. For example, if your files came from Microsoft Word or Frontpage, they’re probably littered with extraneous <div> tags, smart tags, and class attributes. To clean them up, check the Clean up bad (Word, Frontpage) HTML option, then specify the HTML tags and attributes that should be allowed. Any tags and attributes not in these lists will be removed. A list of suggested tags and attributes is provided, along with an extra set that you should include if your content contains data tables. Please look over both lists carefully before you import. Note that style and align are not among the attributes allowed by default, which might be important to you if you're importing images.

You can select the title tag the same way you chose your content area. You can have the importer remove common words or phrases from your titles. Remember that your site title will be added automatically to your WordPress posts and pages (depending on your theme). If it’s part of your HTML files’ <title> tags, for example, you’ll need to remove it now to avoid duplication on your WordPress site.
The importer will encode special characters for you. In the screenshot above, I entered "A&M" even though the page title actually contained "A&M".

The metadata section is where you can specify all the little details: whether you want to import the files as posts, pages, or a custom post type; what the status of the imported posts should be (draft can be handy if you know you'll need to do some additional editing after importing!); which user should be listed as the author; and (for pages and other hierarchical post types) what the parent and page template should be.
What if you need to import some directories as posts and others as pages? Just run the importer twice with different beginning directories. If the site you’re importing has a news section, for example, you could import that subdirectory as posts, then add "news" to your list of skipped directories and import the parent directory as pages.
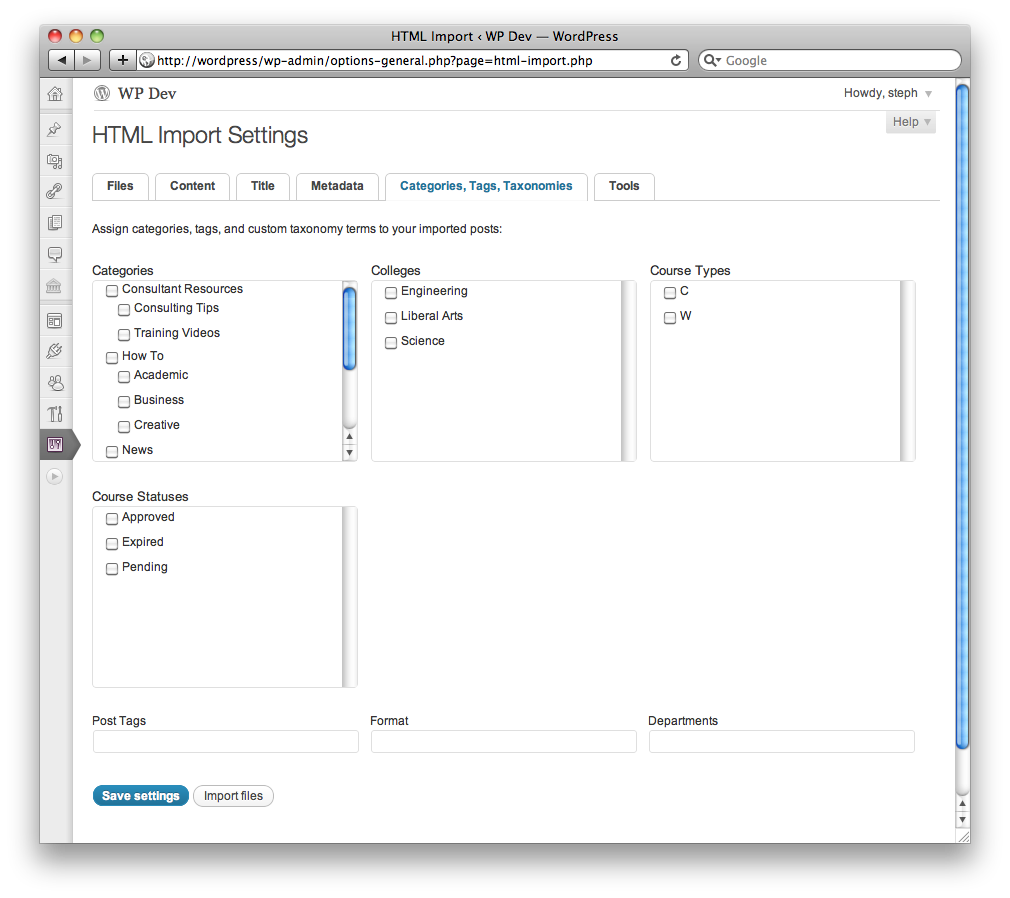
Here you can assign categories, tags, and post formats to your imported files. If you have created custom taxonomies for your site, you’ll see fields for those as well. This screenshot shows the taxonomies for a university site that has a set of taxonomies related to courses.
Once you’ve filled in all the settings, save your settings. Then the import files button will appear. If you need to go do something else and come back to this later, you can either return to this settings screen or go to Tools → Import and select HTML from the list.
When you press "Import files," you'll leave the options screen and jump to the importer:

If you're importing a directory with many files -- say, more than a hundred -- this will take a few minutes. When the importer has finished, it will display a list of the imported files with any errors noted.
The report will include a set of rewrite rules that you can use in your .htaccess file to redirect visitors from your old files to your new WordPress posts or pages. If you entered the old site's URL in your settings, the rules should be exact. Otherwise, they'll use the file system path instead of a URL. You should be able to correct them with a simple search and replace. The importer does not write the new rules to your .htaccess file; you'll need to copy them and paste them into the file yourself. You can retrieve them again later; look for the link in the Tools section of the settings screen.
If you chose to import images, the image report will be shown beneath the redirects. Any image files that couldn't be located will be listed (in orange) so you can add them by hand later.
No matter how careful you were with the settings, there’s a good chance you’ll see some errors in your newly imported content. You’ll probably need to change all your internal links (although you could just let the redirects take care of that problem) and paths to media files other than images.
Visit the Tools section of the settings page for a list of additional plugins that can help you clean up imported content. In particular, Broken Link Checker and Search and Replace are amazingly useful.
I import a few files and then the results page just gets cut off. What can I do?
The importer will attempt to work around your server's max_execution_time setting for PHP (usually 30 seconds), but some servers don't allow this. You can try to increase it by adding a line to your .htaccess file:
php_value max_execution_time 160
If that gets you further but still doesn't finish, just increase the number (it's in seconds). However, note that your host might get irritated with you for hogging the server's resources. If you have a lot of files to import, it's best to install WordPress on your desktop (XAMPP for Windows/Linux and MAMP for Macs make it pretty easy) and do the import there.
It's also quite possible that the script is trying to use more memory than your server allows. You can try to change that setting, too, in .htaccess:
php_value memory_limit 1024M
If you're having trouble getting things to work, you can ask questions in the wordpress.org support forum for the plugin or in the comments on the plugin's home page.